If you’re looking for a meaningful, engaging way to wrap up a history unit or historical fiction novel, let me introduce you to one of my favorite end-of-unit projects: the Historical Artifact Museum Research Project.
This is the kind of project that students remember for years after they’ve completed and experience it, and one that works beautifully whether you’re teaching ancient civilizations, World War II, or pairing history with literature.
In my secondary ELA classroom, I’ve used it successfully with teaching Anne Frank’s story (the graphic novel biography) and George Takei’s They Called Us Enemy, and the structure makes it incredibly easy to adapt to any time period or historical context.
You can do it too! Let me walk you through how to turn your classroom into a museum using this resource.
Why a Classroom Museum Works So Well
At its core, this project asks students to do what historians actually do:
- Research credible sources
- Analyze the importance of objects from a specific time period
- Explain historical significance clearly and accurately
- Present their learning to an authentic audience
Instead of writing yet another essay, students recreate historical artifacts, design museum displays, and participate in a gallery walk that feels purposeful and exciting. It’s hands-on, creative, and academically rigorous—without feeling overwhelming to plan.
Step 1: Introduce the Museum Concept
Start by framing students as museum curators. Their job is to research and preserve artifacts from the time period you’re studying and teach others why those objects matter.
The resource includes clear directions and requirements that explain:
- Individual responsibilities (research, artifact recreation, museum label)
- Group responsibilities (designing a cohesive museum space)
- Expectations for sources, citations, and presentation
I’ve also included an editable introduction slideshow with all this information.This makes it easy to set expectations from day one and answer the inevitable “What am I supposed to do?” questions before they start.
Step 2: Assign Artifacts (Any Time Period Works!)
One of my favorite things about this project is how flexible it is. While the resource includes example artifact lists (like World War II or Ancient civilizations), they’re just that—examples.
You can:
- Create your own artifact list for any historical era
- Tie artifacts directly to a historical fiction novel
- Allow students to propose artifacts with approval
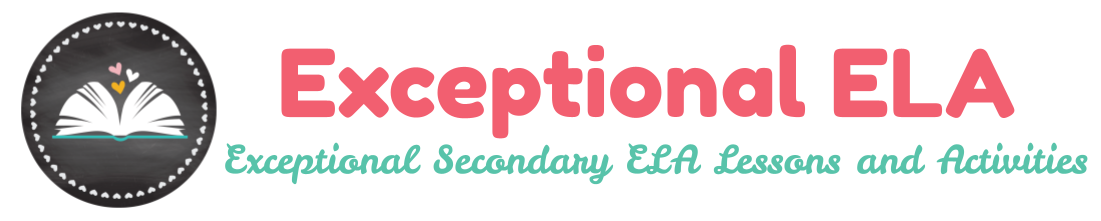
When I used this with Anne Frank and George Takei’s stories, students selected artifacts that connected directly to lived experiences. For example, students in my class have recreated Anne Frank’s diary, baggage tags, ration books, clothing, and even era-period meals!
Each student researches a different artifact, which keeps presentations fresh and prevents repetition.
Step 3: Research + Museum Labels
Students create a museum label that explains the artifact’s origin, its purpose, and its importance to the historical period.
The project includes an example museum label, an MLA format cheat sheet, and clear expectations for credible sources, so it’s easy to walk your students through everything.
This makes it an excellent opportunity to reinforce research skills and citations without needing to build everything from scratch. I usually model one example with the class (included in the resource), then let students work independently or in small groups.
Step 4: Recreate the Artifact
This is where creativity really shines! Students recreate their artifact using household or classroom materials: cardboard, paper, clay, foam board, recycled items, legos, etc.
Included with my resource are pictures of real student projects so your students will have plenty of inspiration! Here are a few examples:
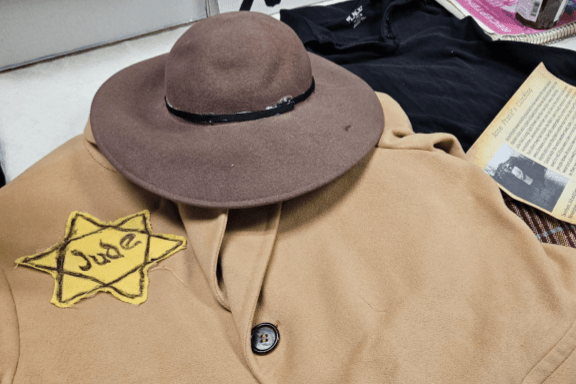
In this display, a student researched Hachimaki headbands from They Called Us Enemy, worn by Japanese Americans during incarceration. What began as a simple cloth headband became a powerful symbol of perseverance, cultural identity, and strength in the face of injustice.
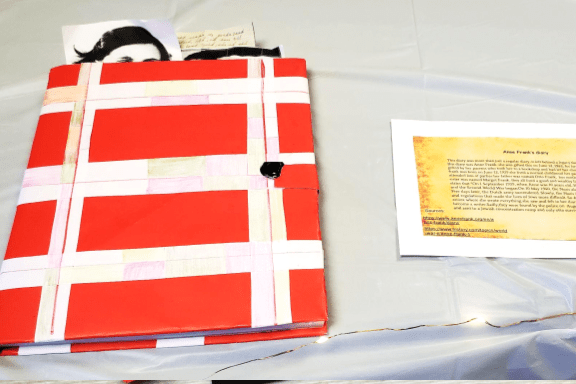
Here, a student recreated Anne Frank’s diary. The project highlights how writing became a source of comfort, resistance, and survival, offering a deeply personal perspective on life in hiding during World War II.
Important note: they’re not allowed to just print a picture and call it done. The expectation is a physical recreation, which raises the level of thinking and effort.
Even reluctant learners tend to buy in here because there’s room for creativity and problem-solving.
Step 5: Design the Classroom Museum
Once artifacts and labels are underway, groups design their museum space. Their desks become exhibits, and they collaborate on things like a museum name, visual consistency (labels, layout, signage), optional extras like tablecloths, signs, or lighting.
The group planning sheet included in the resource helps students divide responsibilities and stay organized—something that makes grading and accountability much easier.
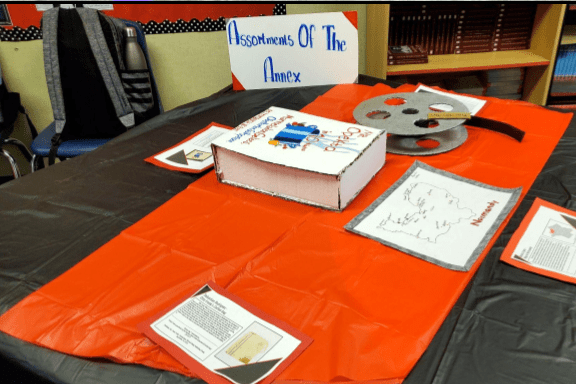
In this example photo, the students in this group named their museum “Assortments of the Annex,” created a sign, designed museum labels with a similar design and color scheme, and brought tablecloths so everything looked polished!
Step 6: Host the Gallery Walk
This is the magic moment! On museum day, students set up their exhibits and stand by their artifacts as visitors rotate through the room. The resource includes guest question sheets, which guide visitors to ask thoughtful, content-based questions.
If you want to take it up a notch, invite other classes, parents, teachers, staff, and admin. Having a real audience instantly raises student engagement and pride in their work.
Step 7: Reflect and Wrap Up
After the gallery walk, students complete a reflection that asks them to think about what they learned, what they would improve, and what stood out most. This reflection is a great way to close the project and gather feedback for next time.
If you’re looking for a project that feels meaningful, memorable, and manageable, this classroom museum experience is one your students won’t forget. Feel free to get in touch with me if you have any questions about this project!
Quick links:
- Historical Artifact Museum Research Project (includes all of the above activities mentioned)
- Anne Frank Activity Bundle
- They Called Us Enemy Bundle (coming soon!)
Happy researching,
Stacey